Reading the Star Map
The star map is where Nova is played. Everything you need to read the situation at a glance is encoded in the colours, labels, and rings on the map. This chapter decodes them.
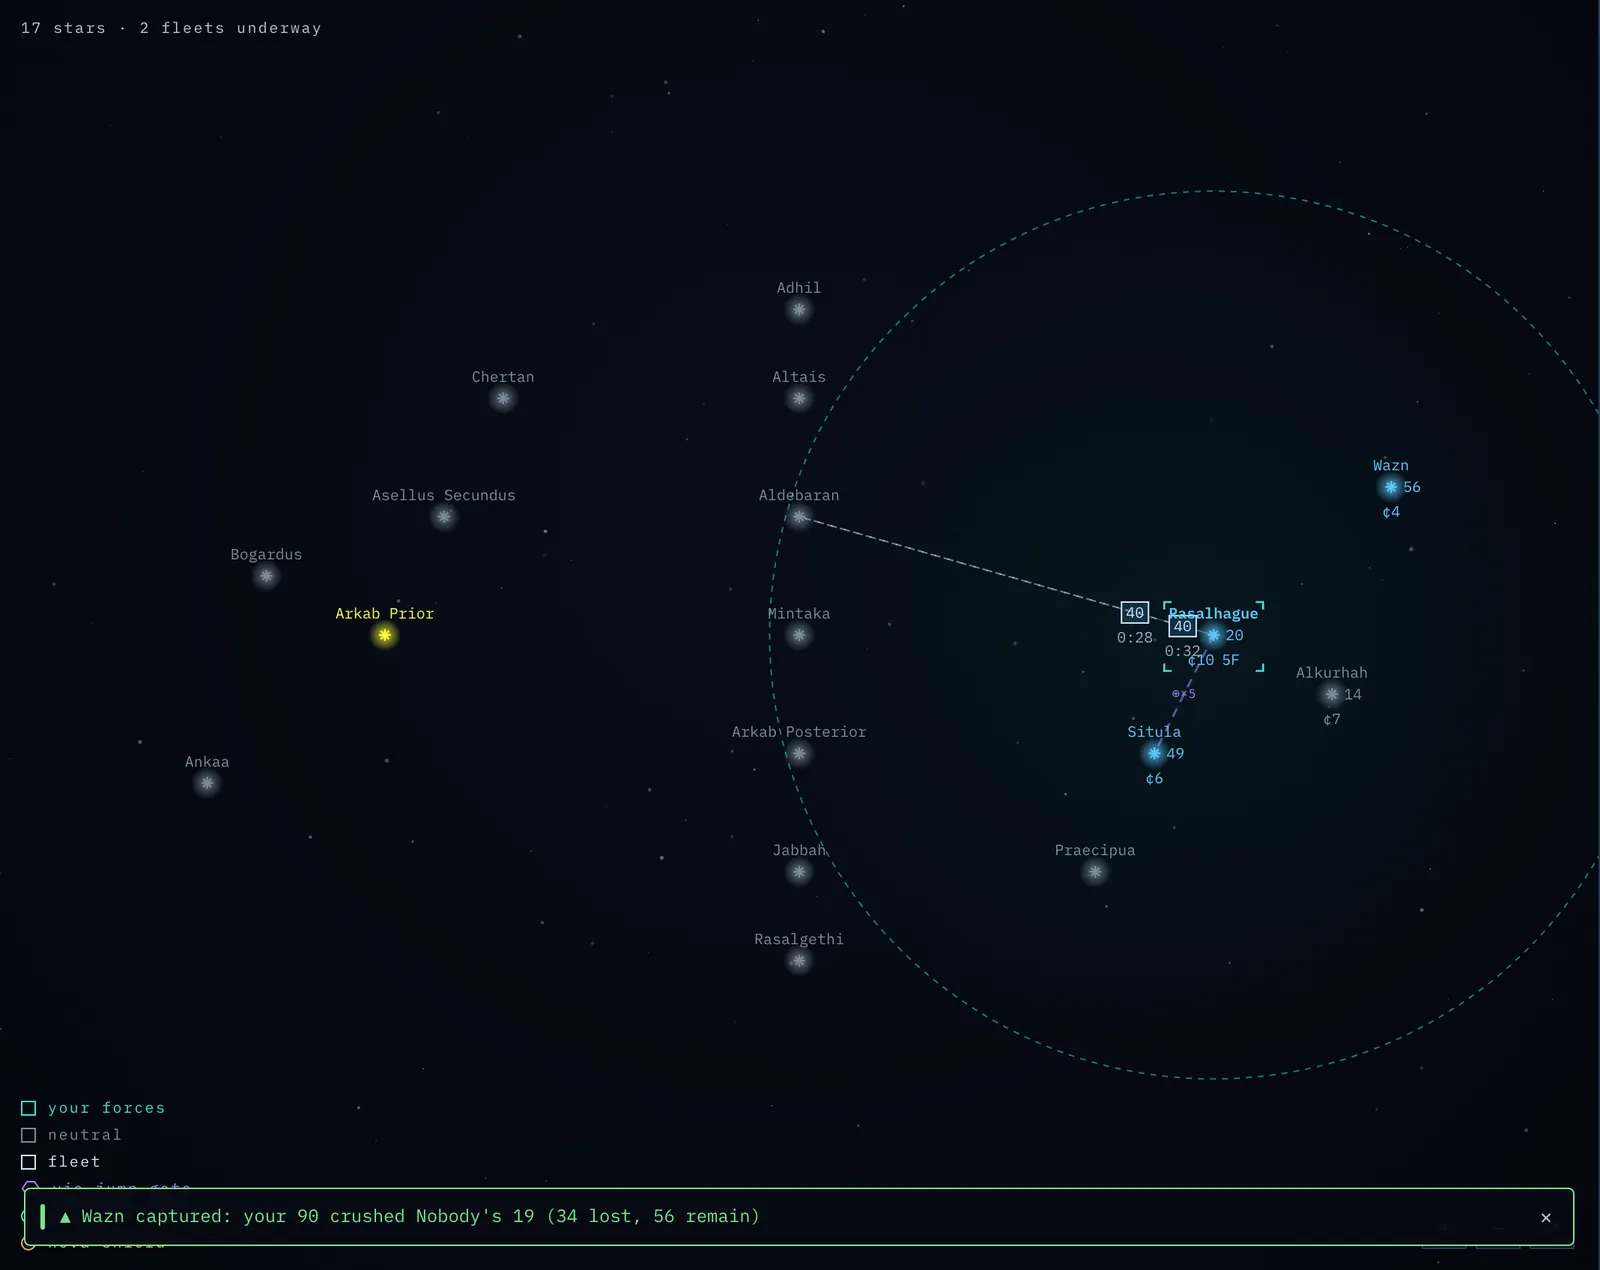
Screenshot: a star map with callouts pointing at an owned star's label, neutral stars, a fleet in transit, the range ring, and a route-preview line.
Stars and their colours
Every star is a glowing point with its name written above it. The colour of a star tells you who owns it:
- Your colour — your stars. (The legend calls these your forces.)
- Another colour — a rival commander's stars. Each commander has a distinct colour.
Tip — hard to tell the colours apart? The Account view has a Color assist switch that swaps every commander colour for a set chosen to stay distinct with red-green colour vision deficiency (see Getting started).
- Grey-blue — neutral stars, owned by nobody. These are the stars you race to claim.
- Dark grey — destroyed ("dead") stars. A dead star has been wiped out by a nova bomb. It is drawn darker than any other star, can never be owned, produces nothing, and any fleet that arrives there is lost. Because there is nothing left to see, a dead star shows no wealth or ship numbers — any figures you once scouted there are gone. Dead stars are permanent scars on the map.
A star whose name is shown in bold has factories on it — a quick visual cue that it is a productive world.
Reading a star's label
Owned and scouted stars carry a short label that packs in their vital statistics:
wealth:ships— the two key numbers, separated by a colon. For example12:30means 12 wealth and 30 ships garrisoned there. Wealth is the income the star pays you each production cycle; ships are its garrison.- A second line shows flags:
3F— the number of factories (here, three).PS— a probe shield is installed.NS— a nova shield is installed.
The colour of the label matters:
- Your colour — this is one of your own stars, and the numbers are current and exact.
- Amber, with a
~in front (e.g.~8:14) — this is scouted intelligence about a star you do not own, gathered by a spy probe. The tilde is a reminder that the information may be out of date — it is a snapshot from when your probe arrived, not a live reading. - No label, just a name — you have no intelligence on this star. It lies outside your knowledge (see Fog of War below).
Tip: The colon number you watch most is the second one — ships. The first — wealth — is your economy. A star showing
15:200is a fortress;4:0is ripe for the taking.
Shields on the map
Your own shielded stars are drawn with a ring of light around the node:
- A green ring marks a probe shield (it blocks enemy scouting).
- An amber ring marks a nova shield (it blocks nova bombs).
You see shield rings on all your own stars. You can also learn about a rival's shields by scouting: a successful spy probe reveals a nova shield in its report, and a spy probe that is blocked by a probe shield marks that rival's star with a green ring — you now know it carries a probe shield. So a green ring means either one of your own probe-shielded stars or an enemy star you have discovered is probe-shielded.
The Layers panel — seeing force strength as weather
Numbers on labels tell you exact strengths star by star; the Layers panel shows you the shape of the war at a glance. Open it with the Layers button beside the map (a stack of squares) and switch on:
- My ships — a soft glowing cloud over the map, brightest where your fleets and garrisons are strongest, fading with distance like a weather radar. Ships in flight glow too, so you can watch force flow across the map as fleets travel.
- Attacking ships — the same cloud for every rival force you know about, in their colours. Remember the fog of war: the cloud can only show what you own, see, or have scouted.
- Labels — switches the per-star detail text on or off. Turning labels off with a strength cloud on gives the cleanest "big picture" view.
The glow reaches a little past your range ring — a strong force visibly projects power over its neighbourhood. Brightness is honest: it is scaled against the strongest commander's total force, so splitting a fleet across two nearby stars never makes the glow dim or jump.
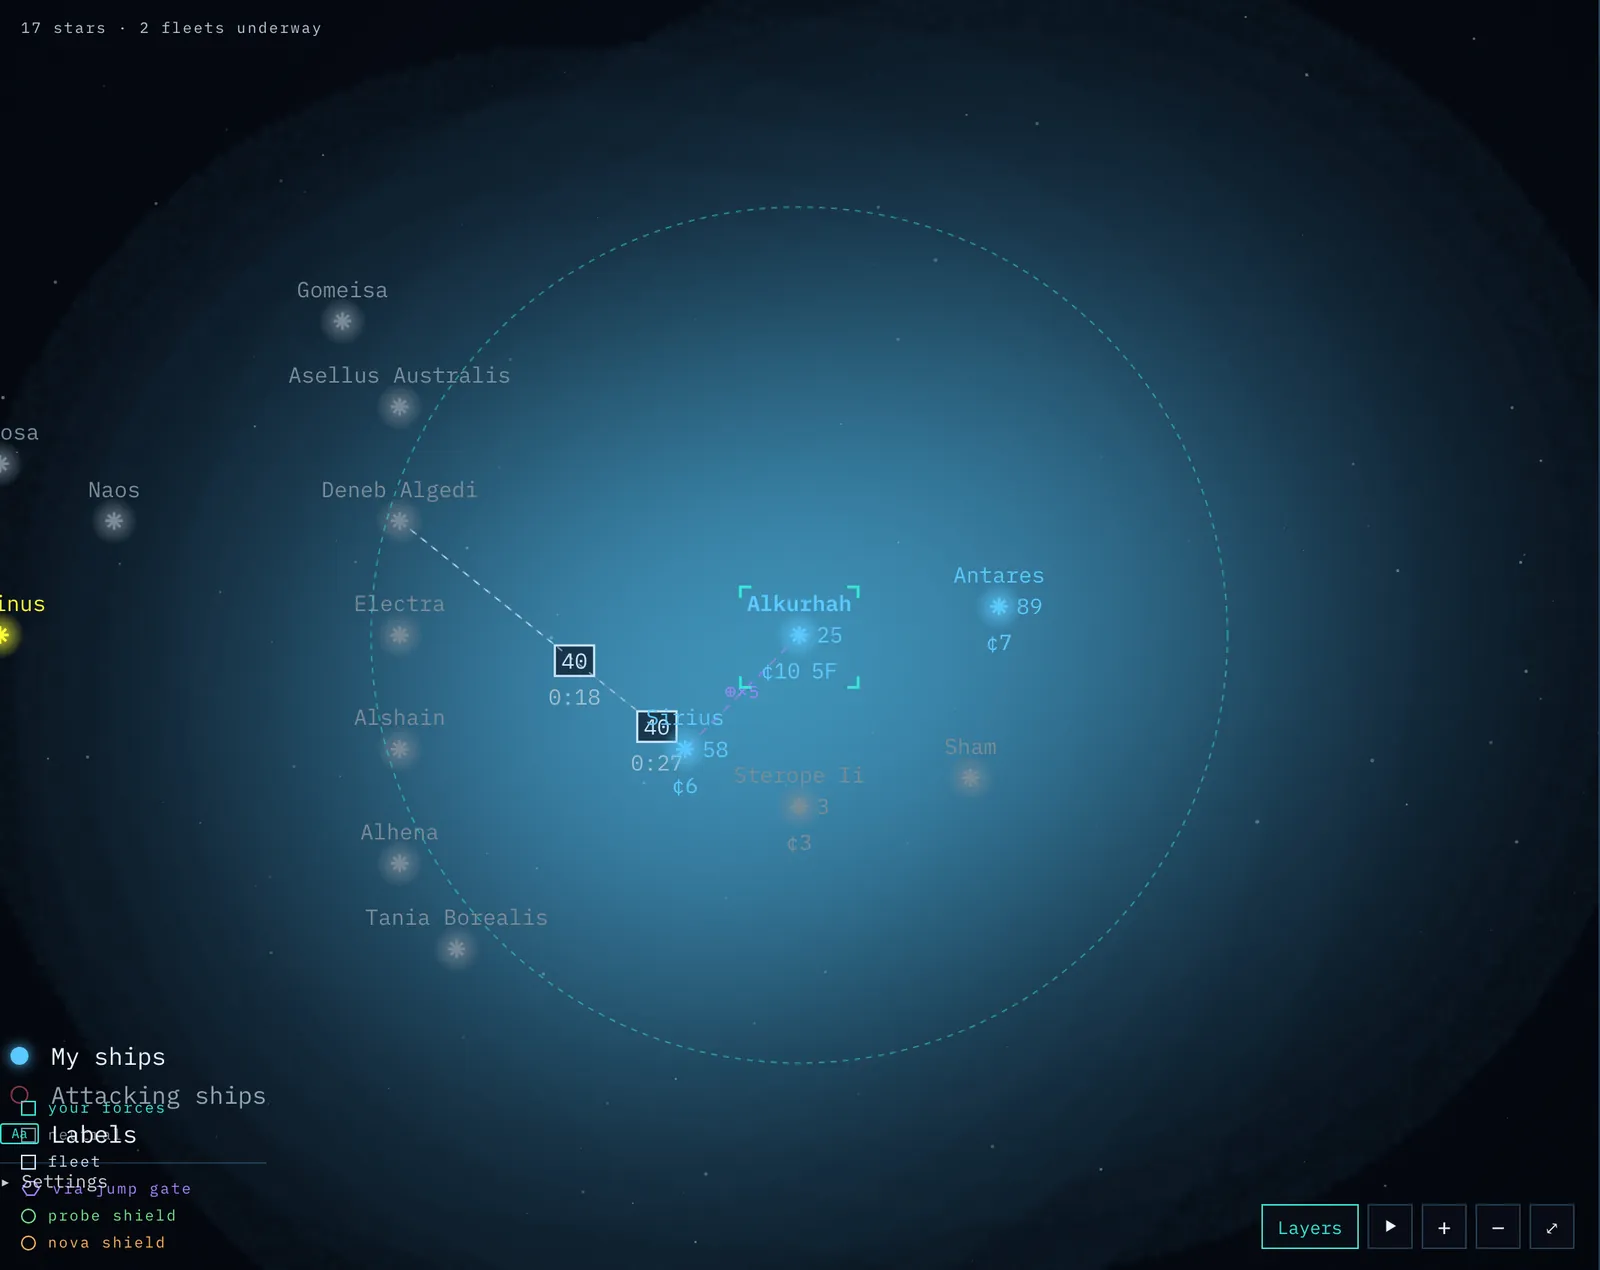
Screenshot: the star map with the My ships cloud glowing over a cluster of owned stars, the Layers panel open showing the My ships, Attacking ships, and Labels switches.
Fleets in flight
When ships or special units are travelling, they appear on the map as a marker moving along a line from origin to destination. The travelled part of the line is solid and faint; the remaining part is dashed. The marker's shape tells you what is flying:
- A boxed number — a ship fleet. The number is how many ships are aboard.
- A green dot — a spy probe.
- A red dot — a nova bomb.
Fleets move smoothly in real time, so you can watch them close on their targets.
Handling the map
Drag to pan; pinch (or scroll) and the + / - buttons to zoom. Three touches make the map easier to work than it may first appear:
- Symbols grow as you zoom in. Stars, fleet markers, probes, bombs, and jump-gate glyphs scale up with the zoom — and never shrink below their normal size when you zoom far out, so the map stays readable at any distance.
- The map opens on your home world. Entering a game starts focused there, as if you had just tapped it — read your own position first, then pull back.
- Zoom follows your selection. With a star or fleet selected, + and - zoom centred on it, pulling it to the middle of the view — and tapping a star (or following a link to one) pulls in to a legible zoom on its own, while always keeping the star's whole range ring on screen: everything you could strike from there stays in view.
- Repeated taps cycle through a pile. Where a fleet passes over a star, or several objects overlap, tapping the same spot again selects the next object in the stack instead of the same one — keep tapping to reach the one you want.
The range ring
When you select a star, a soft dashed circle is drawn around it. This is your range ring, and its radius is your commander's range in parsecs. A fleet can make a direct jump only to stars inside this ring. (You can still reach stars beyond it — see Routing in the Commanding Fleets chapter — but only by hopping through your own stars.)
The range ring is your single most useful planning tool: select a star and instantly see everywhere it can strike.
The route preview
While you are setting up a Send fleet order and have picked a destination, Nova draws a dashed line along the exact path your fleet will take, with small pips at each star it will pass through. If the destination is far away, the line bends through your own stars — the multi-hop route. This preview shows you the plan before you commit; it is not editable, but it lets you confirm the fleet will go where (and how) you expect.
Fog of war — what you can and cannot see
Nova never hides the layout of the galaxy. You always see every star's position, its name, who owns it (by colour), and whether it is dead.
What you do not automatically see is the detail of stars you do not own — their wealth, ship counts, factories, and shields. There are only two ways to learn those:
- Own the star — your own stars always show full, live detail.
- Scout it with a spy probe — a probe reveals a star's defences, shown thereafter as amber, possibly-stale intel. Even a probe blocked by a probe shield teaches you something: you learn the star carries a probe shield (shown as a green ring on the map), rather than nothing at all.
Battles update this intel too. If you attack a star and its defenders hold, your scouted ship count for it drops to the survivors — so the amber numbers reflect the outcome of the fight, not the older probe reading. And if you lose one of your own stars to an attacker, you now see the enemy's remaining ships on that captured star — the force that took it and holds it — rather than whatever count you last scouted. Either way, the numbers track the latest battle. And losing a star never erases what you already knew about it: your last reading — including any probe shield or nova shield you had spotted — stays on record as last known until you learn something newer.
If you select a star you have no intel on, the Star panel says "No intel — outside your sensor coverage." That is the fog of war: you can see the rival's territory on the map, but you must scout to learn what is actually defending it.
A star's history
Select any star and the Star panel includes a History section — that star's past, as you witnessed it: captures, battles fought over it, bombs and probes that struck it, with how long ago each happened. It is your war diary for that world; a star you have never had intel on simply shows "No recorded history." Like everything else, history respects the fog of war — events you had no way to see are not in it.
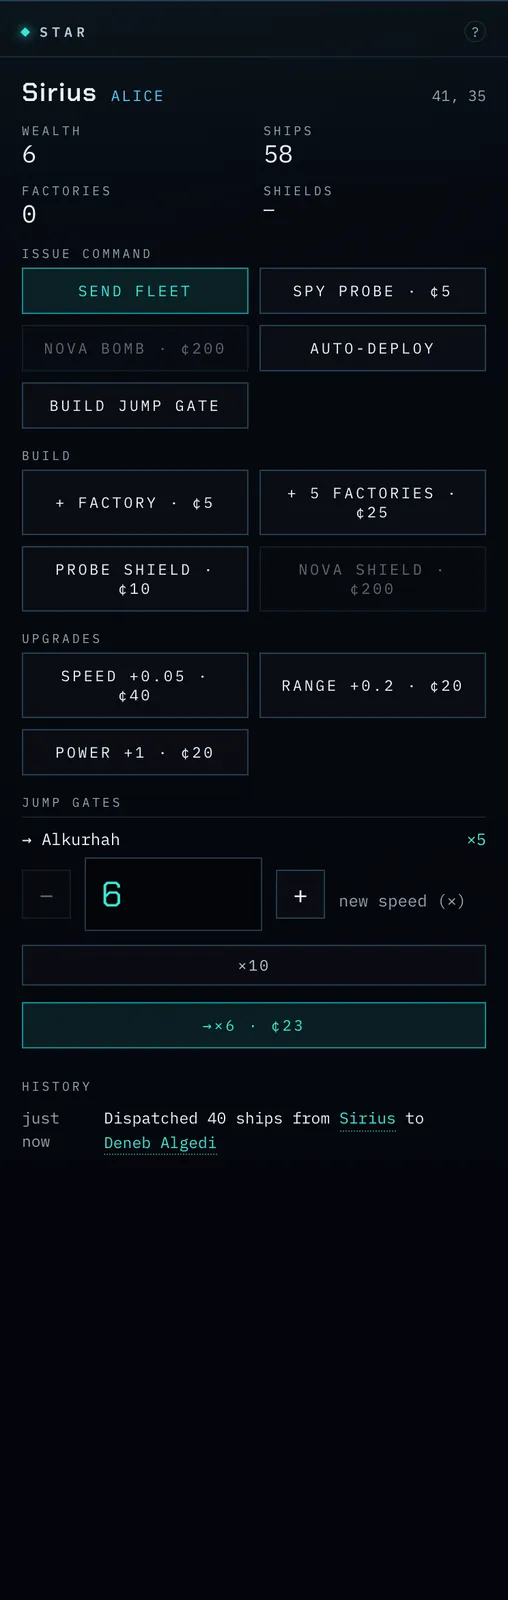
Screenshot: the Star panel for a captured star, its History section recording the battle that took it.
Replay — watch the war so far
The Replay button beside the map (a play triangle) plays the whole game back through the map itself. A control bar appears with a timeline scrubber — drag it to any moment and the map shows the galaxy as it stood then: stars change hands, fleets fly their old routes, strength clouds swell and fade, jump gates appear at the moment they were built. Use pause, pick a pace (from "in 15s" up to "in 5m" — it starts at a brisk "in 30s"), or scrub freely; the close button returns you to the live game.
Two things to know:
- It is your replay. History plays back exactly as you saw it at the time — fog of war and all. What you never scouted stays dark, even in the past.
- The strength clouds switch on automatically for the show (they are the best way to watch the tide turn) and your own Layers choices come back when you exit.
Replay is at its best when a game ends: run the full war "in 1m" and watch how it was won.
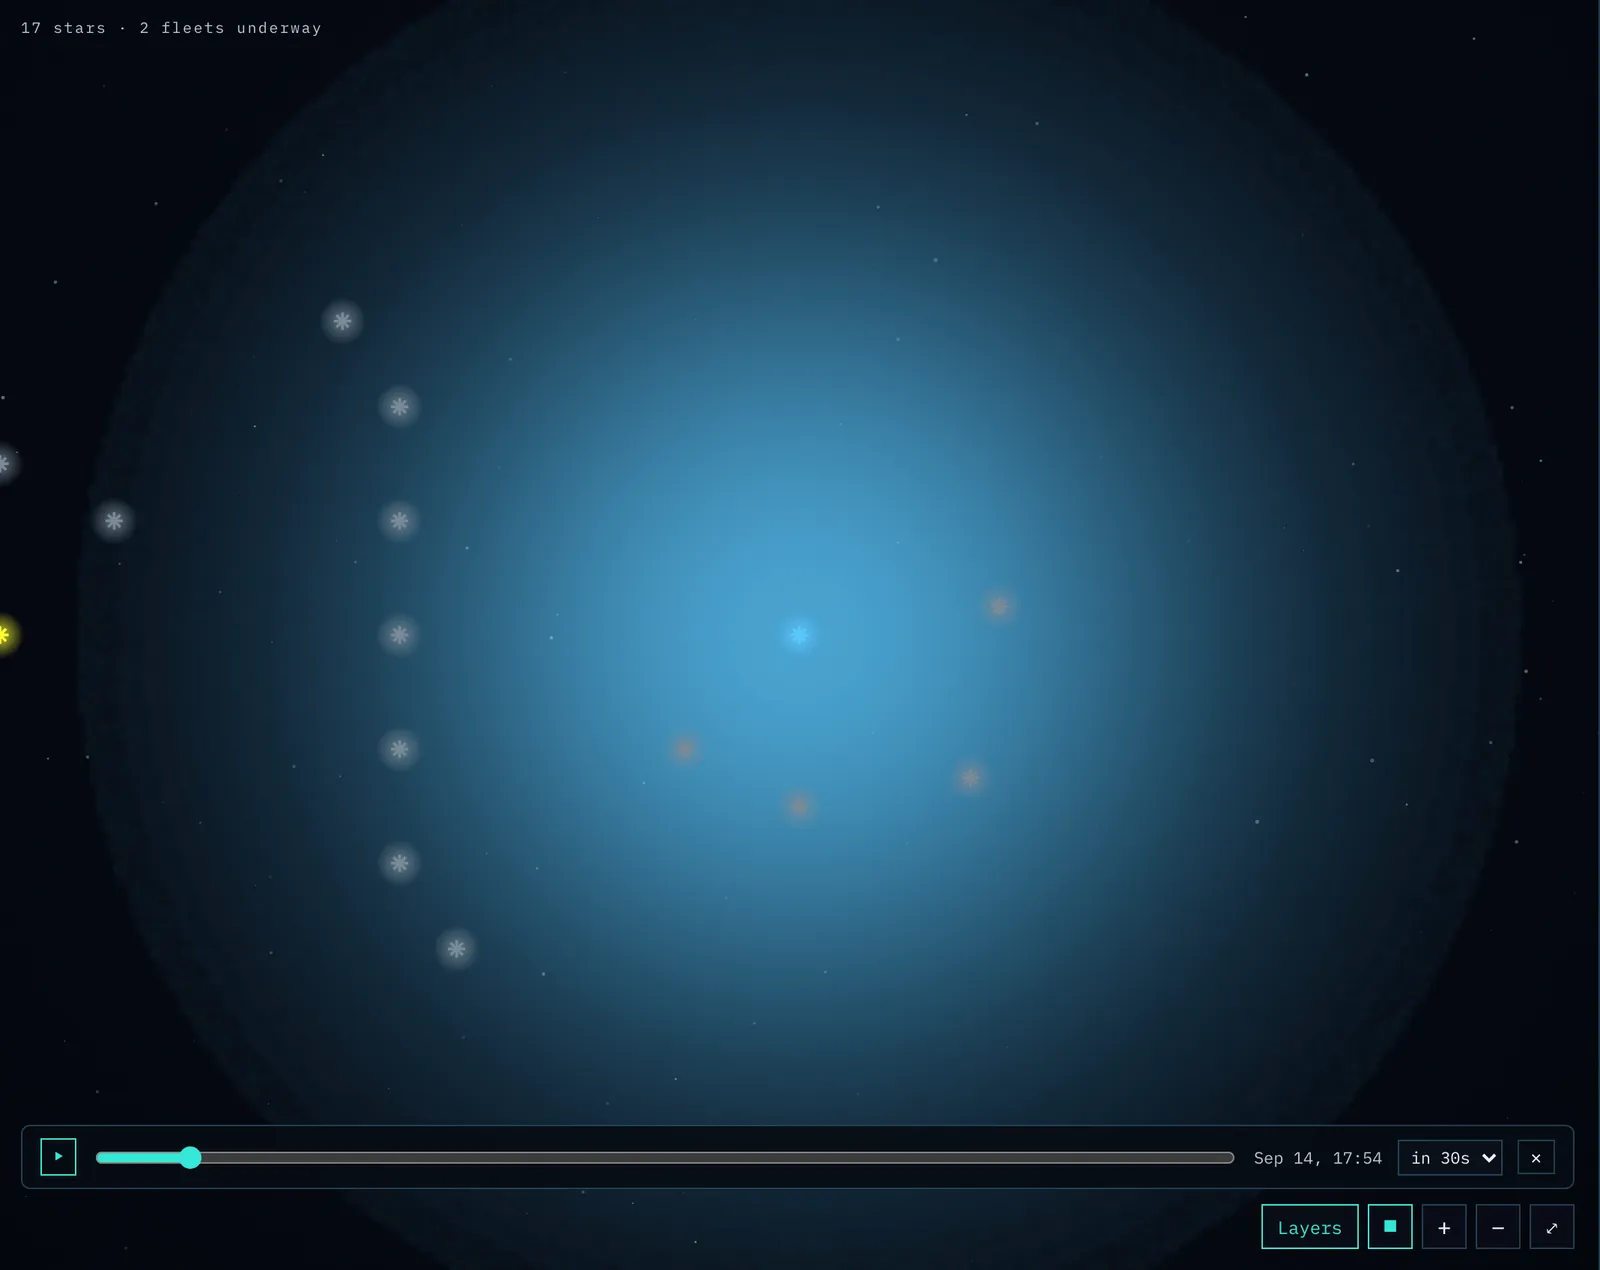
Screenshot: the map mid-replay with the replay bar — play/pause, the timeline scrubber, the clock, and the pace control.
The Game Clock
Two timers govern every theatre, both shown in the status bar:
- Mission ends — a countdown to the end of the game. When it reaches zero, the game is over and the commander holding the most living stars wins. The game's total length is a real-world duration, set when the theatre is created (for example, 24 hours) — it does not depend on how fast the game clock runs. A game can also end early — before this clock runs out — the moment a single commander is the last one controlling any living star. See Winning the Game.
- Next production — a countdown to the next production cycle, the moment when your factories build new ships and your stars pay their wealth into your treasury.
How quickly production cycles, fleets, and battles unfold depends on the theatre's time compression — a setting chosen at creation that makes game time run faster than real time. At 1× the game runs in real time, so a production cycle (one game-day) takes a real day and fleets crawl over hours; crank the compression up and the same events arrive every few minutes. The mission length stays the same real number of hours either way — higher compression just packs more production cycles and battles into it. You never need to do the arithmetic: just watch the Next production countdown to know when reinforcements and income are about to land, and the Mission ends countdown to know how long the game has left. See Time compression in the next chapter.